Tickets board
Kanban overview, filters, and moving work between statuses.
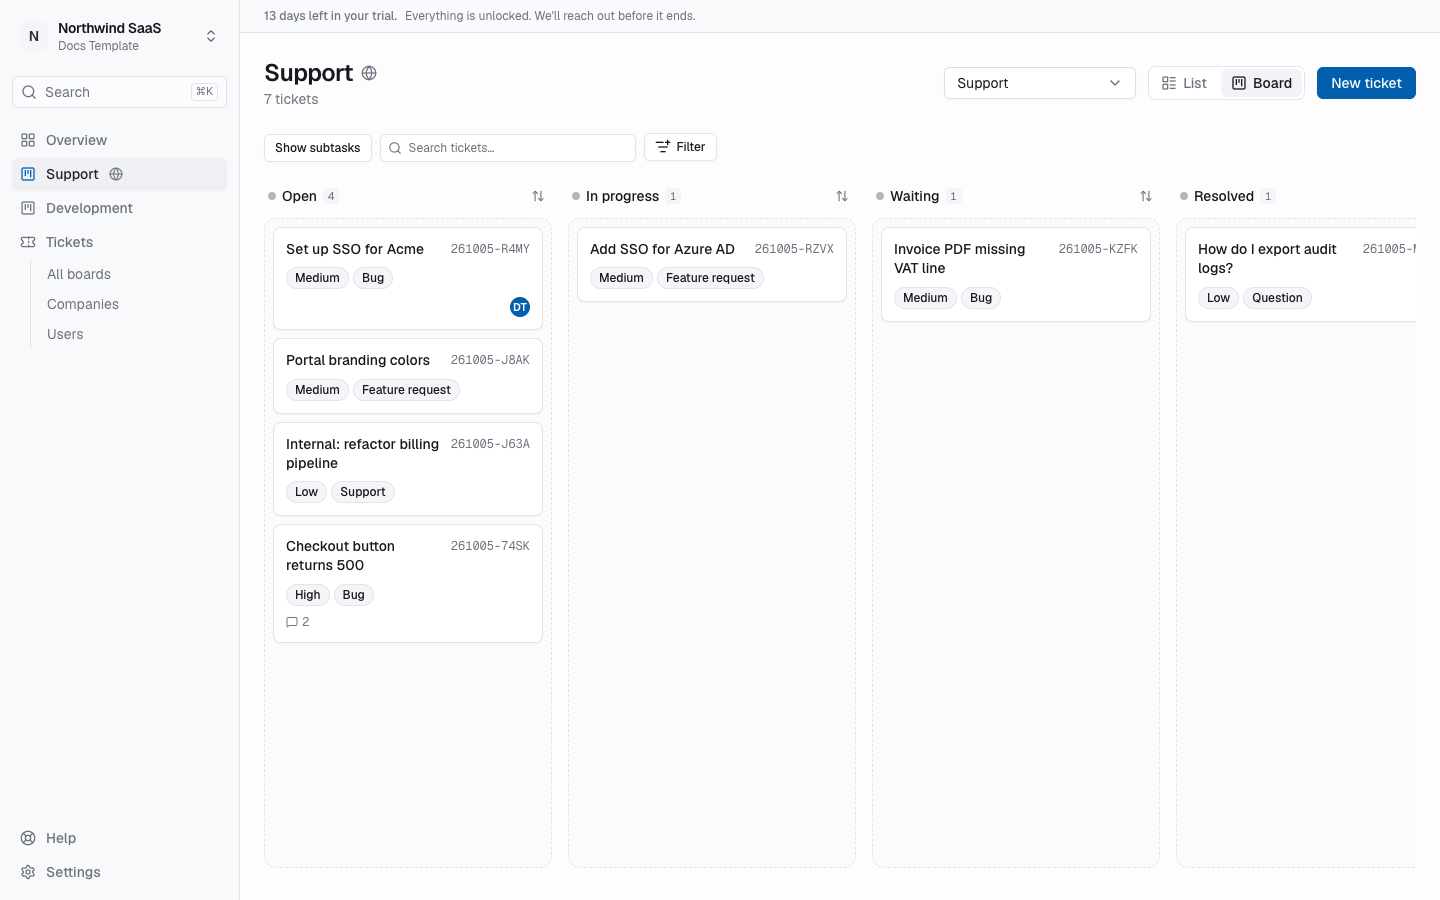
Open Tickets in the sidebar. It opens the customer board (“Support”) — the daily cockpit for your support team. A workspace can have several boards; pinned boards sit right under Overview, and Tickets → All boards lists them all. See Boards.
Layout
- Columns = the board's workflow statuses (from Settings → Workflow, per board).
- Board switcher — in the page header, next to the list/board toggle, once the workspace has two or more boards. Switching keeps your view but resets filters, because statuses, types and labels differ per board.
- Cards show reference (
#12), title, company, priority, labels, assignees. - Create opens the new-ticket flow (see Create a ticket).
Filters
The bar above the board (and the list) narrows which tickets you see. Click Filter, pick a field, then a value. Each chip’s middle segment switches is / is not.
- Assignee — Me (assigned to you), Unassigned, or a specific teammate
- Status / Priority / Type — the options of this board
- Company / External ID — when the workspace has companies
Filters stay in the URL, so they survive a reload and switching between board and list. Clear removes them all.
Move a ticket
Drag a card to another status column. The status updates immediately for everyone with access (and can notify assignees / the team depending on notification settings).
Open a ticket
Click a card to open ticket detail (side peek or full page). Details, conversation, and metadata live there — see Ticket detail.
Tips
- Prefer clear titles (“Acme: checkout 500 on apply coupon”) so portal users and agents share context.
- Use labels for cross-cutting themes (e.g.
billing,onboarding). - Keep internal tickets off the customer board until you intentionally set visibility to
publicorrestricted. - Work that customers should never see (development, internal projects) can live on its own board: tickets on any board other than the customer board stay with your team.