On your website
Put the registration form on your own website, announce events there, or build your own.
Every published event has its own page. You can also bring events to your own website — in four ways:
| Way | What visitors see | Effort |
|---|---|---|
| Link to the event page | Your event page, on its own address | Copy a link |
| Embed the form | Programme and registration form inside your page | One snippet per event page |
| Announce events | A bar at the top or a window in the middle of every page | One snippet for the whole website |
| Build your own | Your events in your own design | Development work |
First: add your website
Under Event settings → Your websites, add the
address of your website, e.g. https://www.example.com. People can only register from websites
listed there. Showing events works everywhere.
Link to the event page
The simplest way: on the event in your dashboard, click Copy link and link to it from your website, a newsletter or a social post. The page shows the programme and the registration form in your workspace's name. With your own address it runs on your domain, e.g. events.example.com.
Embed the form
Paste this where the event should appear, with your workspace and the event's web address (both are in the event page's address):
<div data-solutiondesk-event="your-workspace/your-event"></div>
<script src="https://events.solutiondesk.io/widget.js" defer></script>
It shows the event with its cover image and more images, its programme and the registration form, and adapts to the width of your page.
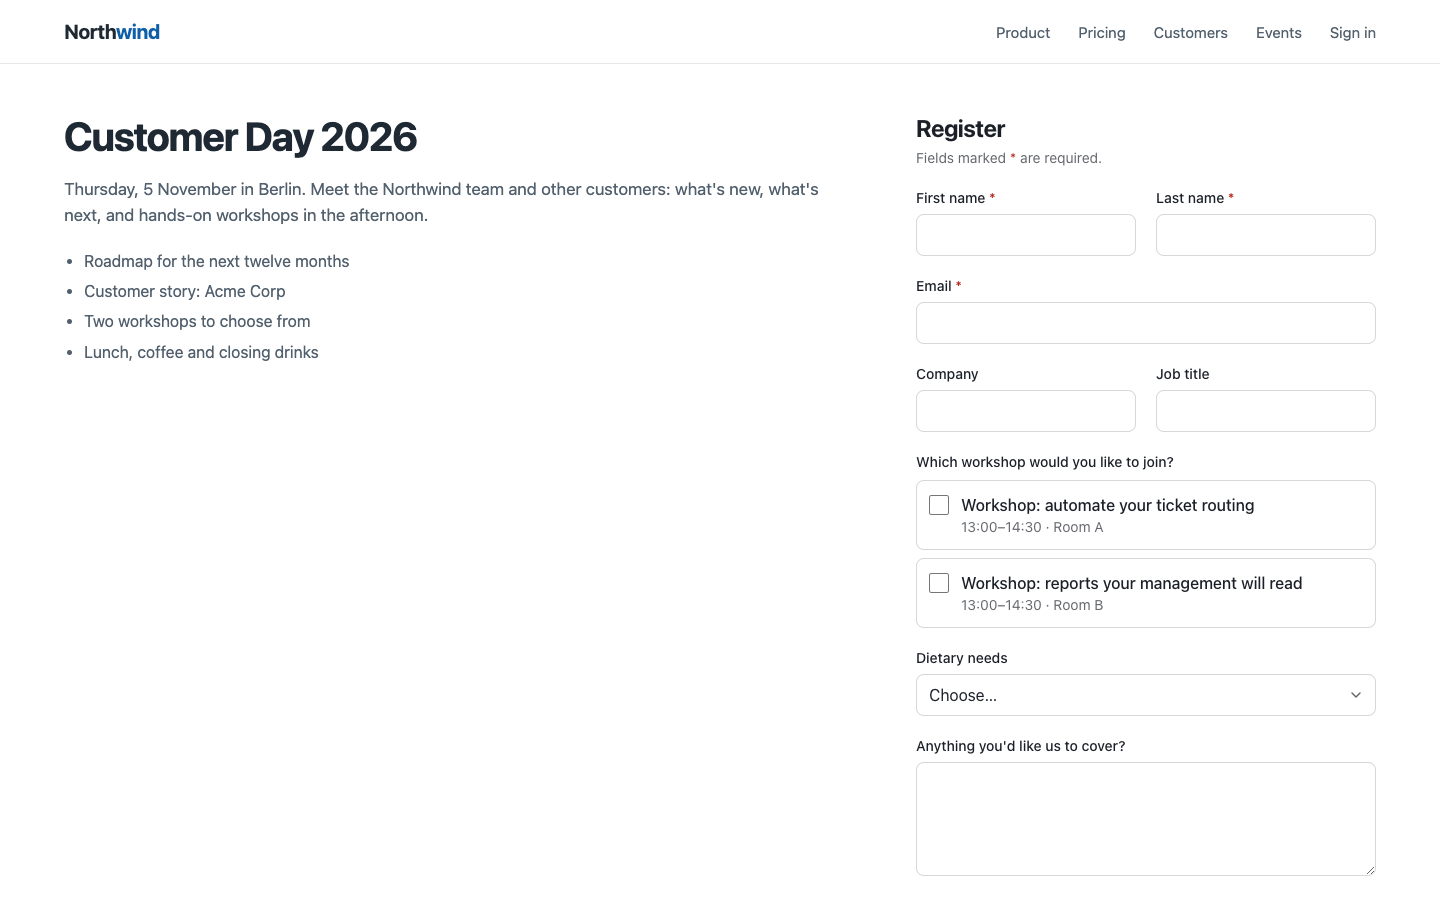
Adjust it with attributes on the div:
data-show-programme="false"— without the programme.data-show-details="false"— without cover image, date, place, description and images, e.g. when your page already says it (as above).data-locale="de"— the language to show, for events offered in several languages. Without it, the visitor's browser language decides.
Match your website's look with CSS variables on the same element:
<div
  data-solutiondesk-event="your-workspace/your-event"
  style="--sd-accent: #0f5fa8; --sd-accent-text: #fff; --sd-radius: 12px; --sd-font: inherit"
></div>| Variable | Changes |
|---|---|
--sd-accent / --sd-accent-text | Buttons and highlights, and the text on them |
--sd-text / --sd-background | Text and background |
--sd-radius | Rounded corners |
--sd-font | Font — inherit takes your website's |
The form uses its own styles, so your website's CSS doesn't change it — and it doesn't change your website.
No scripts allowed on your site? Embed the event page in a frame instead, with ?embed=1 added to its address:
<iframe src="https://events.solutiondesk.io/your-workspace/your-event?embed=1" style="width:100%;border:0"></iframe>Announce events
Point visitors of your website to an event with a bar at the top of every page or a window in the middle. Visitors can close it, and it stays closed for them.
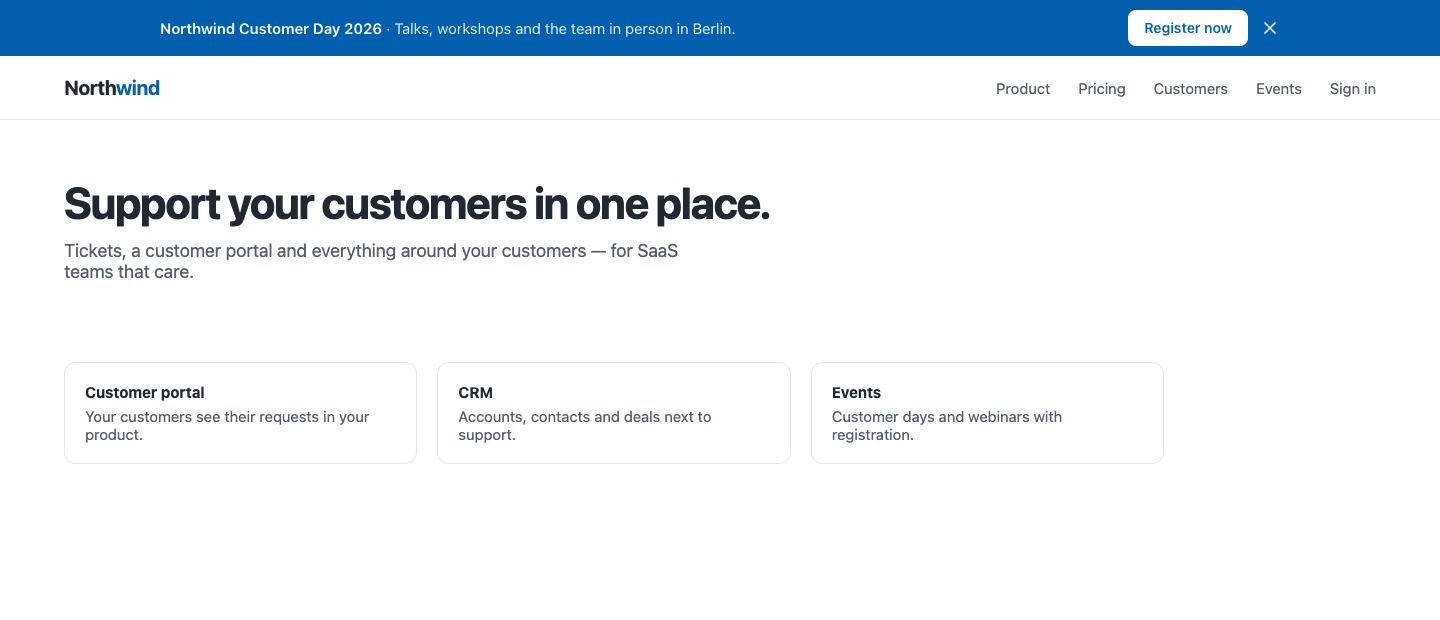
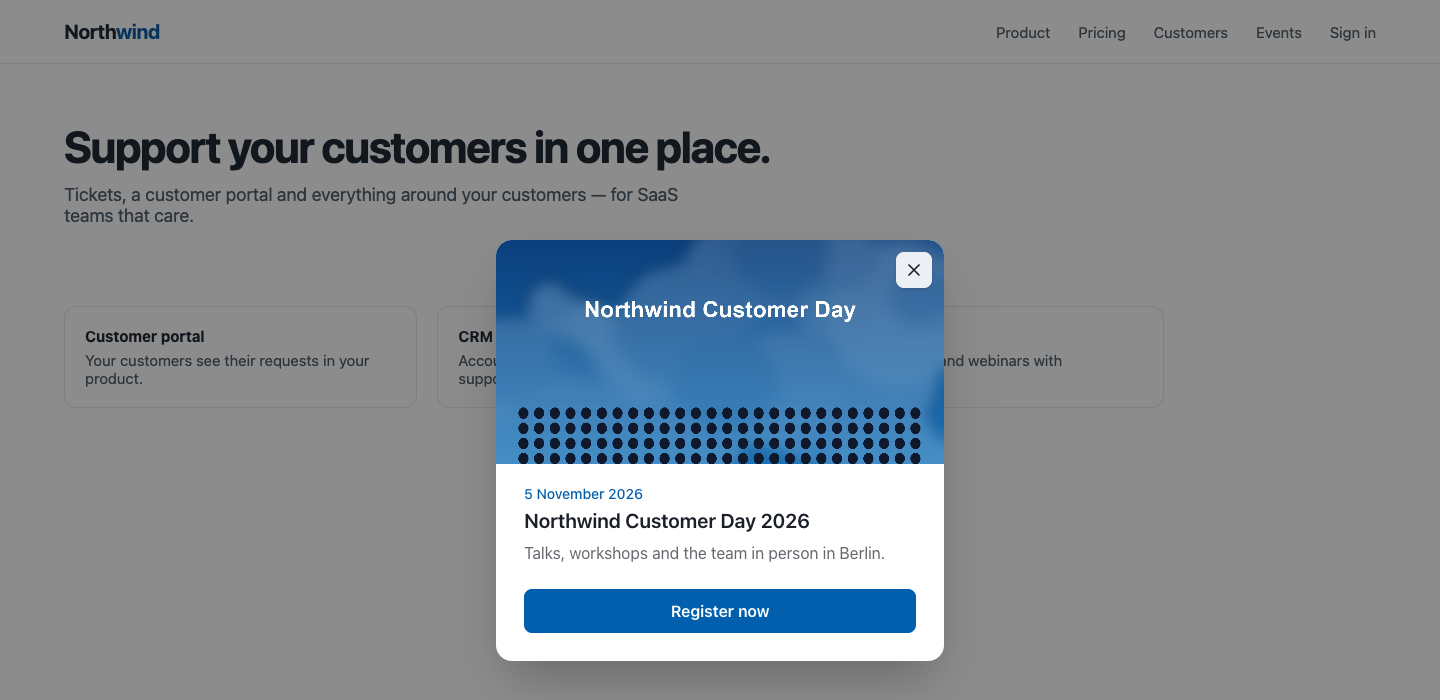
Set it up for an event
Open the event, and on the Plan tab go to On your website:
- Switch on Show on my website.
- Pick the Appearance: Bar at the top or Window in the middle.
- Write the Headline, an optional Text and the Button label.
- Button leads to — leave it empty to link to the event page, or enter your own page about the event.
- Check the Preview, then click Save announcement.
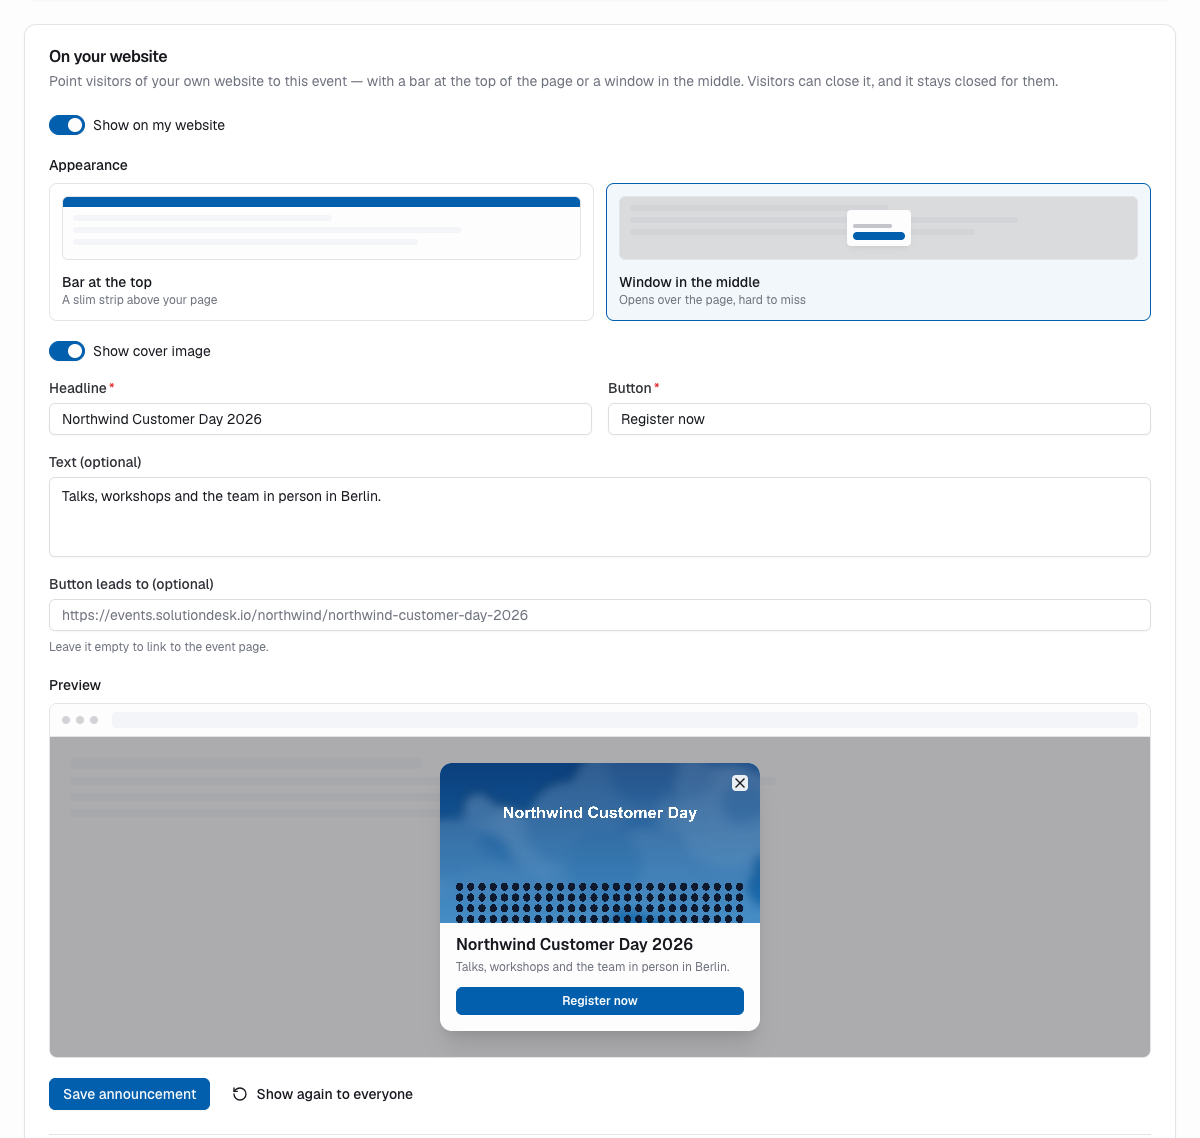
The window shows the event's cover image on top, if it has one; the preview shows it too. To leave it out, turn off Show cover image. The announcement only appears while the event is Published and registration is open. When it doesn't show, the card says why — e.g. the event is still a draft or registration has closed.
Add the snippet to your website once
Below the preview, Add this once to your website has the snippet with your workspace filled in. Paste it into every page, best right before </body>:
<script src="https://events.solutiondesk.io/widget.js" data-solutiondesk-announcements="your-workspace" defer></script>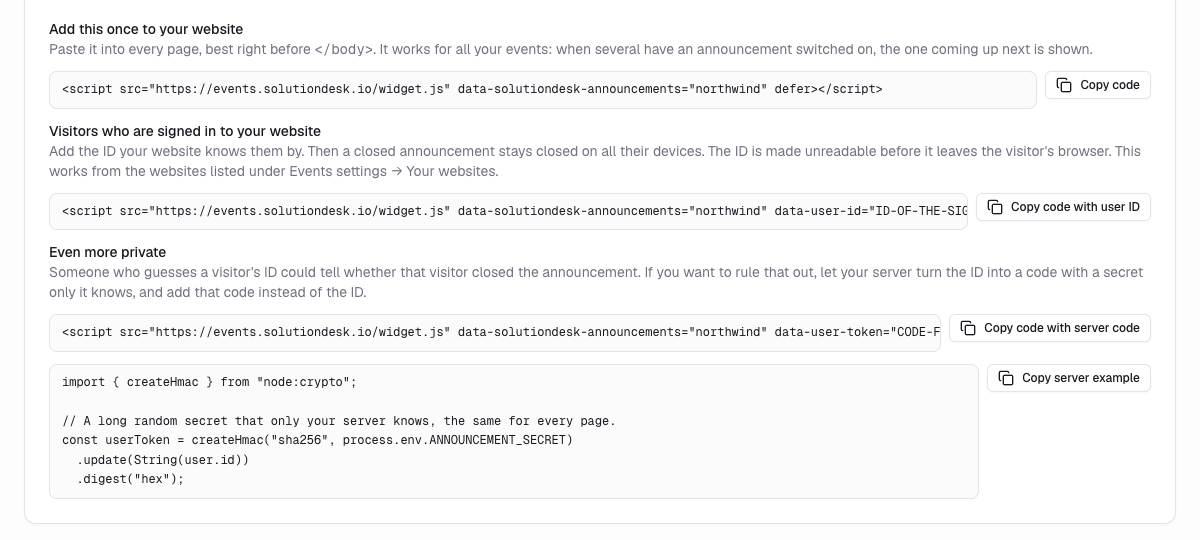
It works for all your events: when several have an announcement switched on, the one coming up next is shown. You never have to change the snippet when you announce the next event.
data-locale="de"— the language: the announcement's texts in that language if the event is offered in it, and German labels. Without it, the visitor's browser language decides. Put the language of the page here if your website has several.data-event="your-event"— only this event's announcement, e.g. on a page about a single event.
Closed stays closed
Once a visitor closes the announcement, it stays closed in their browser. If you changed the text and want everyone to see it again, click Show again to everyone.
Visitors who are signed in to your website. Add the ID your website knows them by, so a closed announcement stays closed on all their devices:
<script src="https://events.solutiondesk.io/widget.js" data-solutiondesk-announcements="your-workspace" data-user-id="ID-OF-THE-SIGNED-IN-USER" defer></script>The ID is made unreadable in the visitor's browser before anything is sent. Remembering it across devices works from the websites listed under Your websites; elsewhere it is remembered in that browser only.
Even more private. Someone who guesses a visitor's ID could tell whether that visitor closed the announcement. To rule that out, let your server turn the ID into a code with a secret only your server knows, and add that code instead:
<script src="https://events.solutiondesk.io/widget.js" data-solutiondesk-announcements="your-workspace" data-user-token="CODE-FROM-YOUR-SERVER" defer></script>The code is an HMAC-SHA256 of the user's ID with your secret, written as 64 hexadecimal characters. In Node.js:
import { createHmac } from "node:crypto";

// A long random secret that only your server knows, the same for every page.
const userToken = createHmac("sha256", process.env.ANNOUNCEMENT_SECRET)
  .update(String(user.id))
  .digest("hex");
Keep the secret the same; if you change it, signed-in visitors see announcements they had closed once more. SolutionDesk never needs to know the secret.
Build your own
Developers can list your published events, read one with its programme and form, and send registrations directly — to show your events in your own design, in your app or on a page built by your website's system. No key is needed to read; registering works from the websites under Your websites or from your server.
curl https://api.solutiondesk.io/v1/event-pages/your-workspaceThe list contains only published events that are open to everyone — no drafts, no cancelled events and no events for invited people only. See Host API → Events for every endpoint with example answers. A signed-in user of your own product can be registered from your server without the confirmation email.
Related
- Events and Registration
- Event settings — your websites and your own address
- Host API → Events