Boards
Run several ticket boards in one workspace — and keep exactly one of them for your customers.
A workspace can have several ticket boards: one for support, one for development, one for customer onboarding, and so on. Each board has its own ticket types, templates, statuses, priorities, labels and groups, so every team works with the columns and forms that fit its work.
The customer board
Exactly one board reaches your customers. It starts out as Support and is marked Visible to customers everywhere it appears (a globe mark in the sidebar, a badge in Settings, a hint in pickers).
| Board | Who sees its tickets |
|---|---|
| The customer board (“Support”) | Your team, and — following each ticket's visibility — customers in the portal, guest portals, the host integration and customer email |
| Every other board | Your team only. Customers never see these tickets, whatever their visibility says |
You can rename the customer board, but you can't archive or delete it — customers see its tickets.
Internal boards stay internal
A ticket on another board never shows up in a portal, a guest portal or a customer email — not even when it is set to public. To share a ticket with customers, it has to live on the customer board.
Find and switch boards
- Tickets in the sidebar opens the customer board. While you are on a board, Companies or Users, the Tickets section unfolds with All boards, Companies and Users.
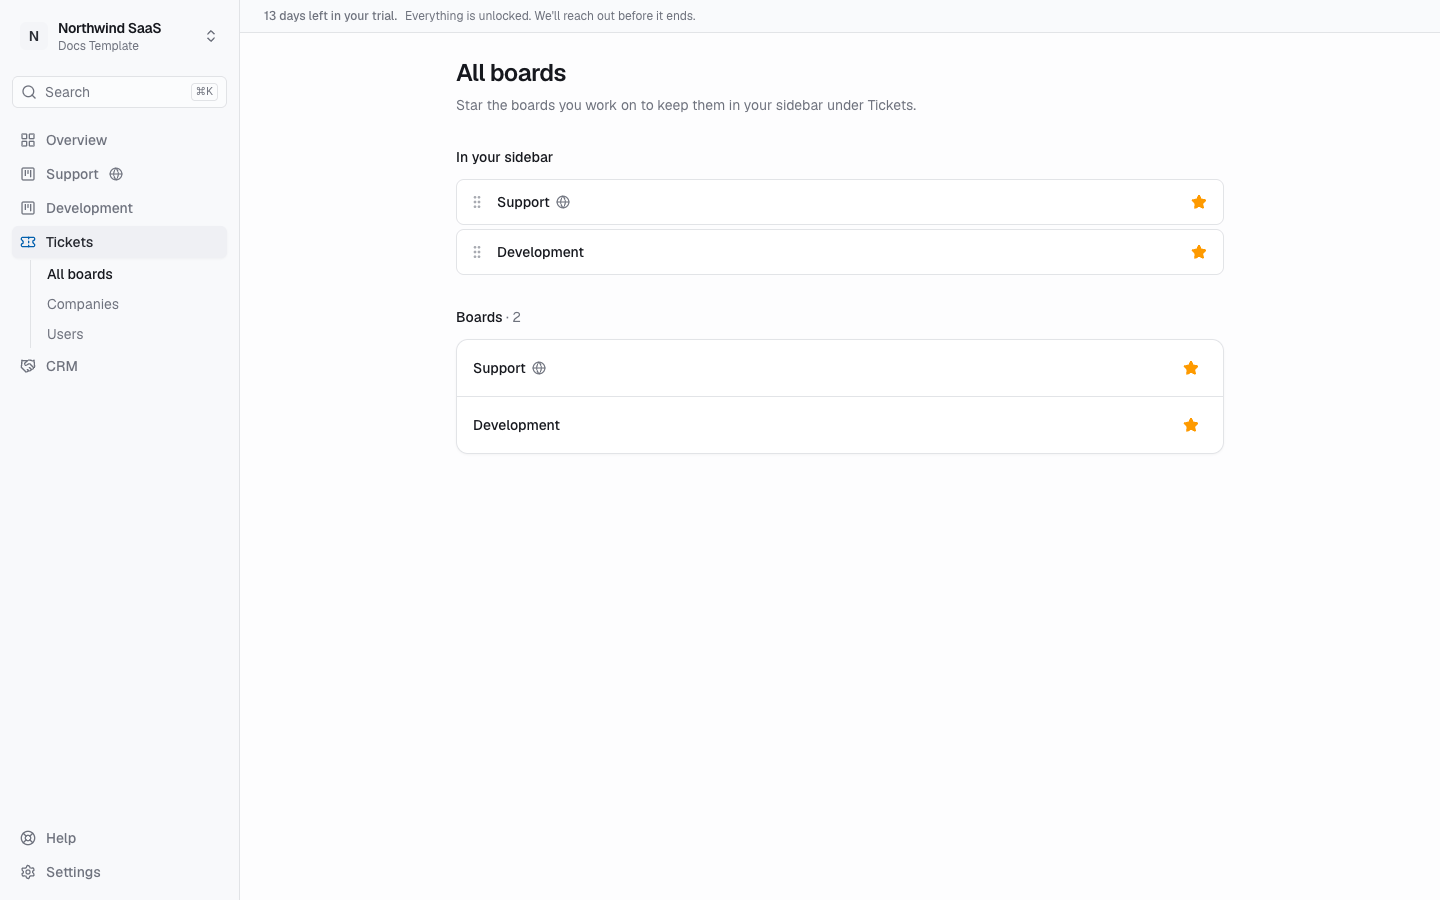
- All boards lists every active board. Click the star to pin a board; pinned boards appear in the sidebar right under Overview, in the order you drag them into on the All boards page. Pins are personal and follow you across devices.
- On a board page, the board switcher in the page header (next to the list/board toggle) jumps to another board. Your list or board view stays; filters are reset, because each board has its own statuses, types and labels.
Create tickets on a board
New ticket on a board page files the ticket on that board, with that board's types, forms, priorities and statuses. On any board other than the customer board, the visibility field reminds you: “This board isn't visible to customers.”
Subtasks always live on their main ticket's board.
Archived boards stay readable but take no new tickets.
Manage boards (owners and admins)
Open Settings → Boards. Members see the list but can't change it.
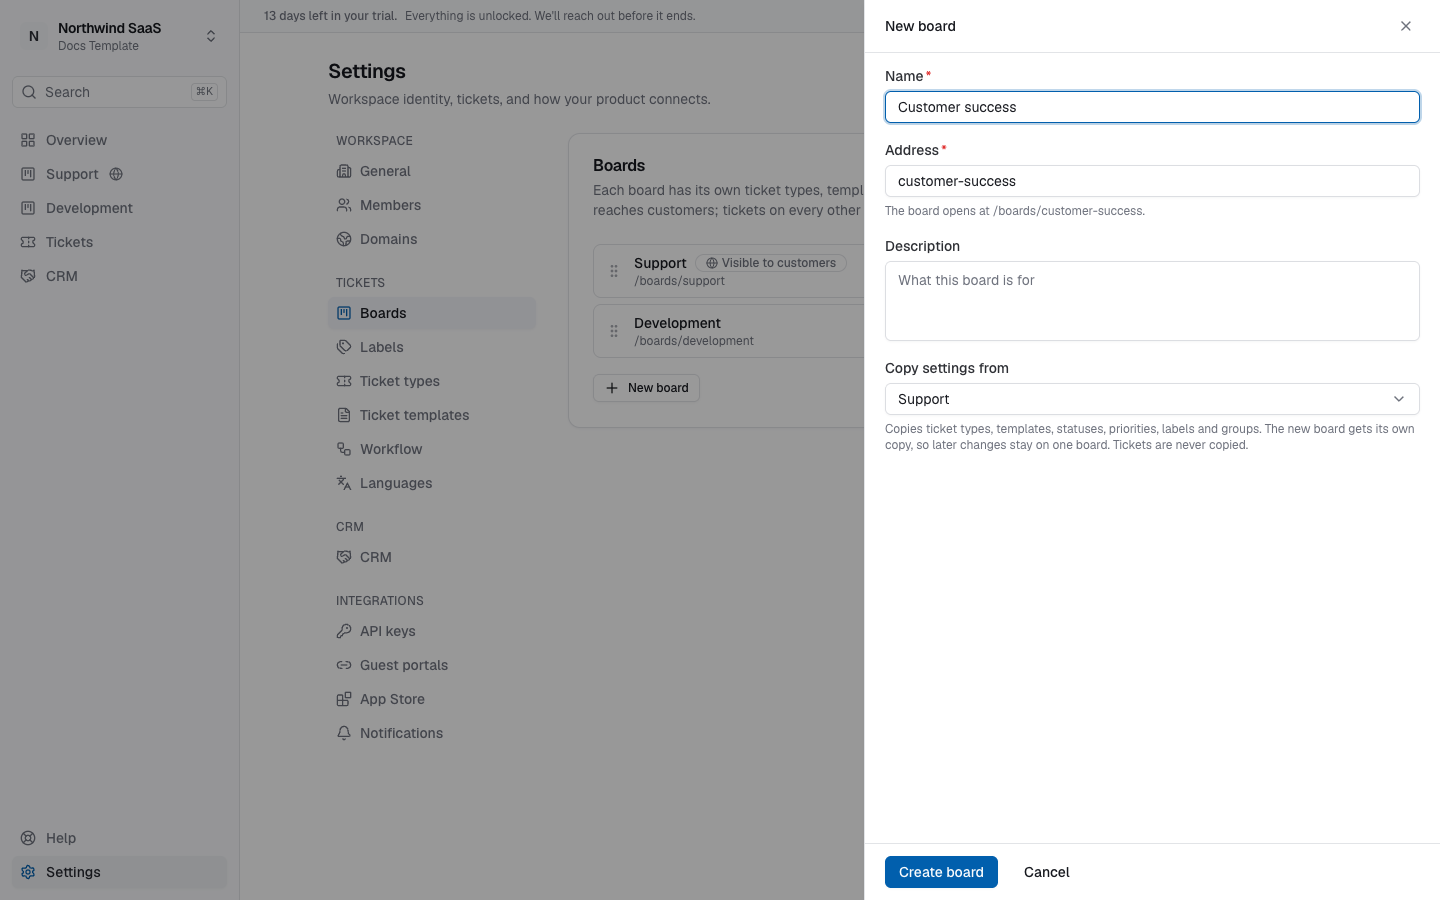
- New board — give it a Name, an Address (the board opens at
/boards/<address>; it follows the name until you change it) and an optional Description. - Copy settings from — start from another board's ticket types, templates, statuses, priorities, labels and groups, or from the defaults. The new board gets its own copy: later changes stay on one board. Tickets are never copied.
- Edit — rename a board or change its description. Renaming keeps the address, so saved links keep working; if you change the address, links people saved to the old one stop working.
- Reorder — drag boards to set the order used in pickers and the switcher.
- Archive — hides the board from the sidebar and pickers. Its tickets stay readable; Restore brings it back.
- Delete — only for a board without tickets. Move its tickets to another board first, or archive it instead.
Settings per board
Labels, Ticket types, Ticket templates and Workflow apply to one board at a time. As soon as the workspace has two or more boards, these pages show a Board picker at the top — changes there apply to the picked board only. See Ticket configuration.
Move a ticket to another board
Open the ticket and choose Move to board… in its Manage card. Once the workspace has more than one board, the ticket's Details show which board it is on.
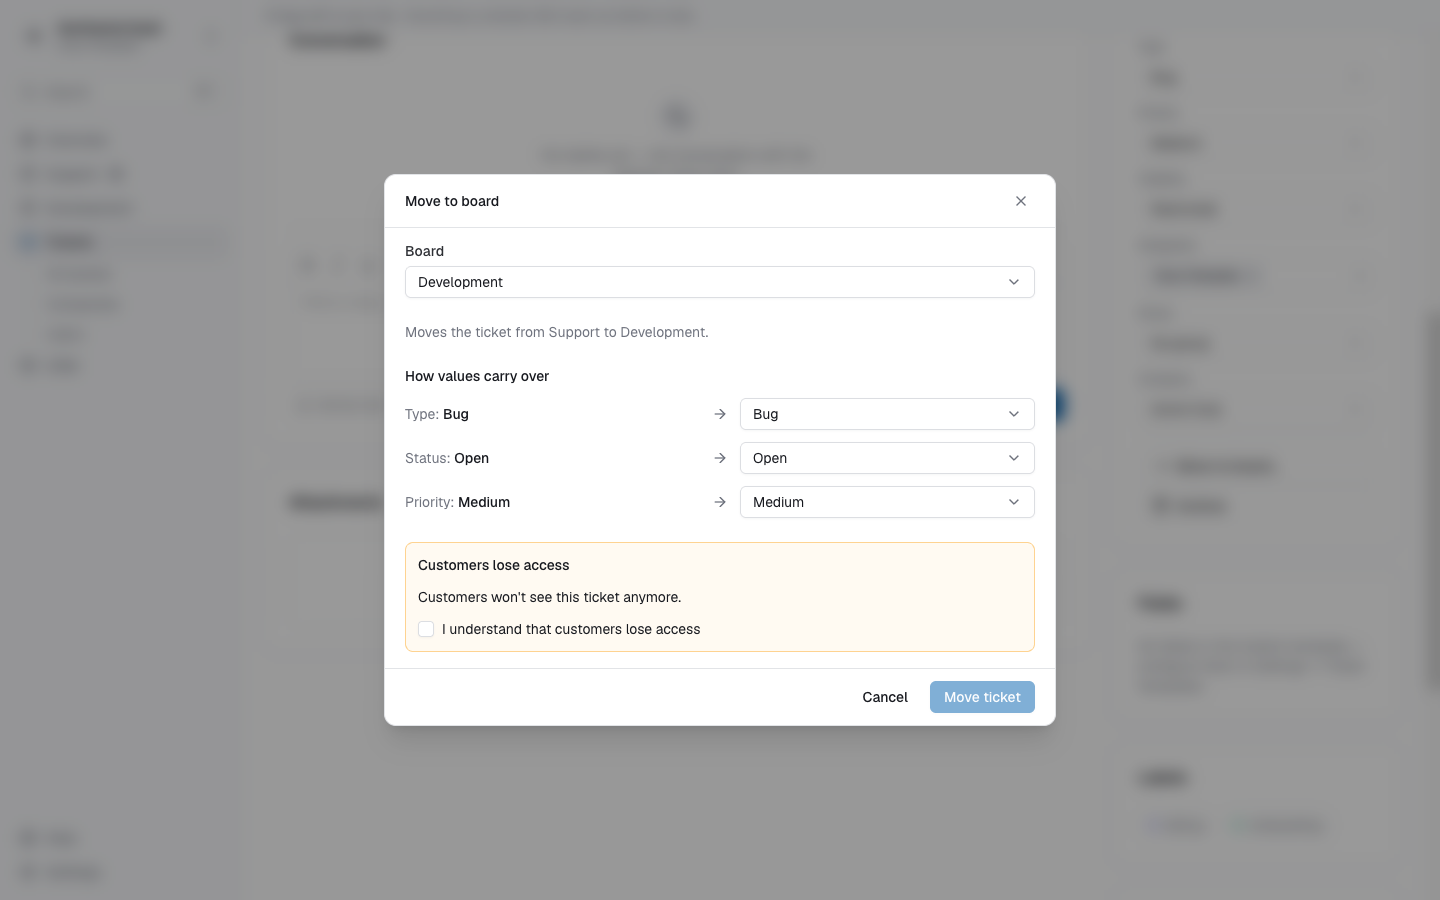
- Choose a board. A main ticket takes all its subtasks along. On a subtask the button reads Detach and move: it leaves its main ticket and moves on its own.
- Check how values carry over. For type, status, priority, labels and group, the dialog suggests the matching value on the new board (labels and groups match by name). Values that don't exist there are flagged; pick a replacement or Remove labels and groups.
- Fill in what the new board needs. Required fields of the new board's form that are still empty must be filled before you can move.
- Review “Won't carry over”. Field values that don't fit the new board's form are listed. They are removed from the ticket, and the old values are kept in an internal note on the ticket, visible to your team only.
- Confirm customer access, when it changes:
- Moving off the customer board: customers lose sight of the ticket, its replies disappear from their view and customers following it stop getting updates.
- Moving onto the customer board: the customers who match the ticket's visibility see it, earlier replies become visible to them again, and so does its history. Internal notes stay hidden either way.
- Move ticket.
The ticket keeps its reference number, so links to it keep working. No email goes out for the move itself; afterwards the ticket follows the new board's rules.
Email per board
Each staff member can mute ticket email from boards they don't work on: Settings → Notifications → Notify me for boards (shown once the workspace has two or more boards). You still get an email when someone assigns or mentions you.